Building Alliance using Netbeans
Introduction
This short guide will help you to set up Netbeans
for compiling Alliance. Once you are done with this guide you will be able to make changes in the Alliance code, compile them and test them using the Alliance testsuite.
Before reading this guide you should have read the Getting
started guide to learn how to retrieve the source from Sourceforge.
Creating a new project
First of all you need to create a new project, so start up Netbeans and choose File->New
Project from the application menu.
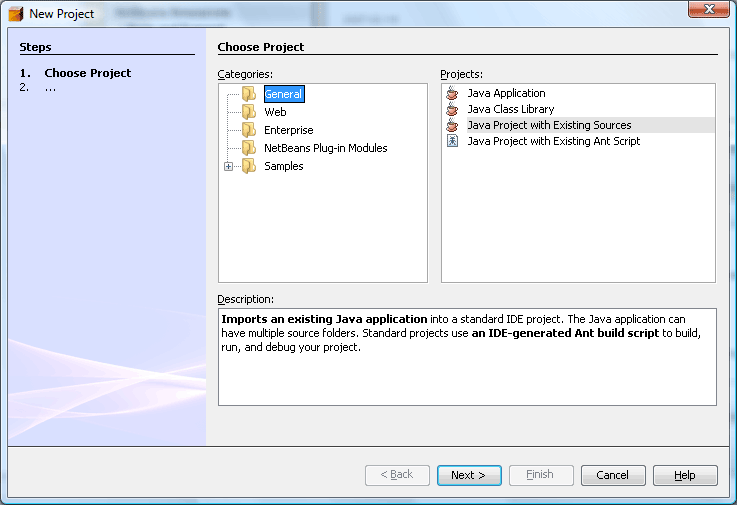
In the dialog that appears, choose to create a "Java Project with Existing Sources"
and then click Next.
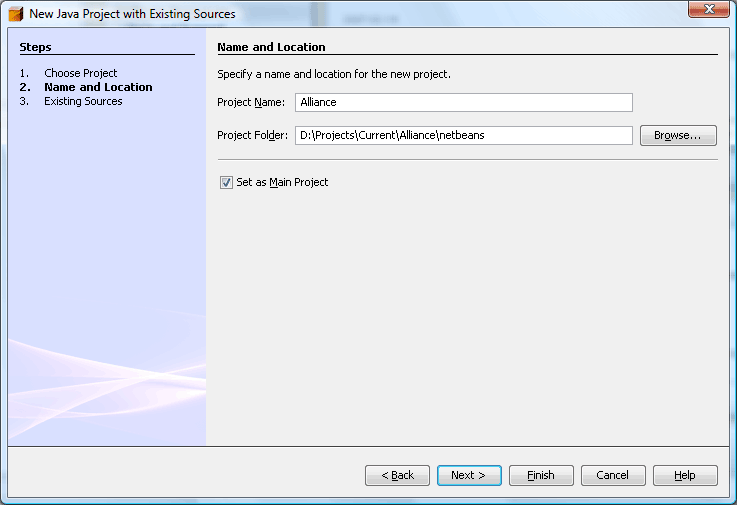
Enter project name "Alliance" and then specify the location for the project files.
I have downloaded the Alliance source tree to the location "D:\Projects\Current\Alliance",
but this will probably be different on your machine. You need to place the project files in a subfolder so in my case I put them under "D:\Projects\Current\Alliance\netbeans".
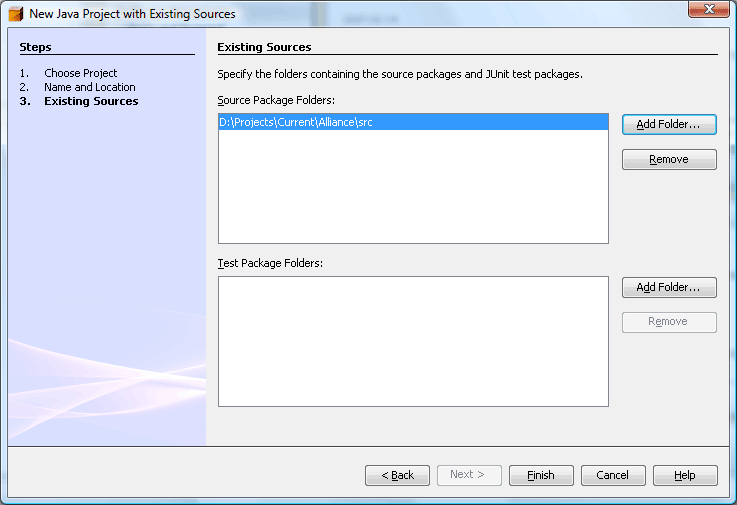
The next step in the wizard lets you specify the location of the source files you
want to include in the project. This is where you point to the "src" directory where
the Alliance source is located. In my case the location is "D:\Projects\Current\Alliance\src".
Configuring project properties
The next thing you need to do is to open up the project properties. This can be
done by selecting File->Alliance properties from the application main
menu. This should open up the following dialog:
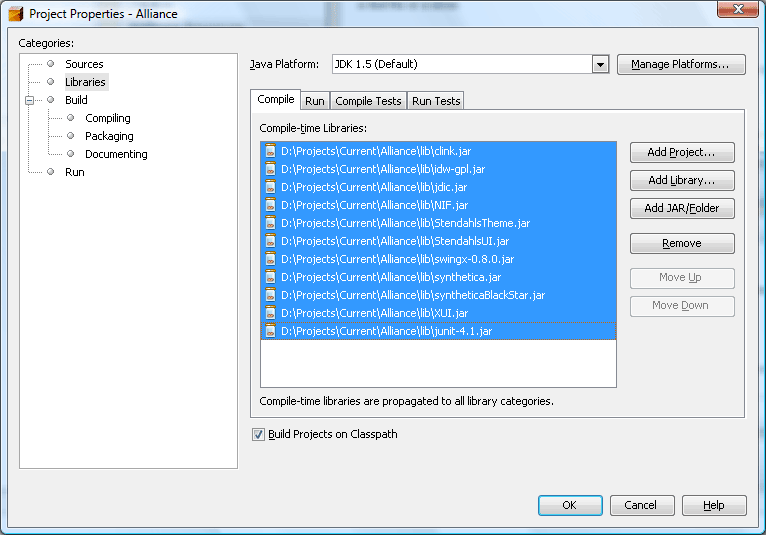
Select "Libraries" in the left tree menu to bring up the view you see above. Click
on "Add JAR/Folder" and select all the JAR files in the Alliance lib folder.
Also make sure you have the JUnit jar file. You can download it from
www.junit.org.
Now click on the "Run" category in the left menu:
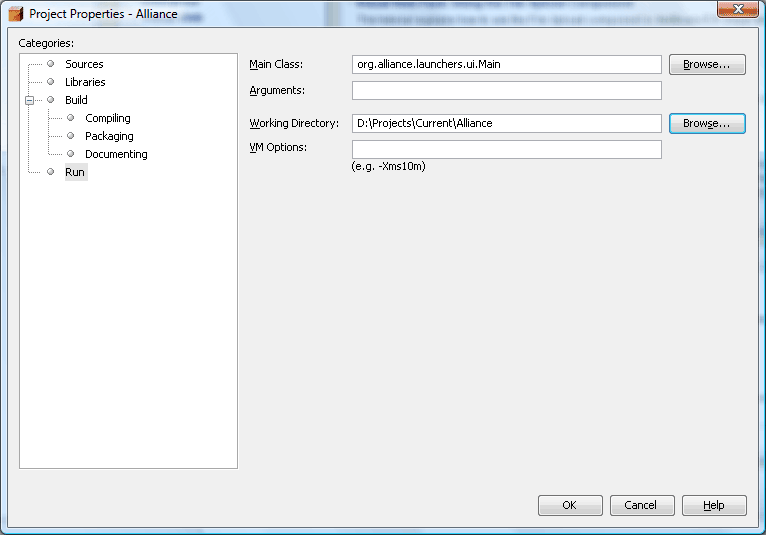
This dialog is where you set the options that Netbeans uses when running your project.
You need to set the working directory to root folder of the Alliance source tree,
i.e. where the "res" folder is located. Otherwise Alliance cannot load its resources
when running. Since I download Alliance sources to "D:\Projects\Current\Alliance"
this is the working directory.
You also need to select a main class that will be the entry point for the application.
If you want to test Alliance in single user mode you should select org.alliance.launchers.ui.Main.
If you want to run Alliance in multi-user test mode (test suite) you must first
choose org.alliance.misc.GenerateTestSuite as main class. Then you compile
and run the project to generate a test suite. You only need to do this once. After
that you can open up the properties and select org.alliance.launchers.testsuite.Main
to run the test suite.
Hack on!
If you need more information have a look at the technical documentation or the developer forum.
|